I had a wonderful time at the Copic class. And DH and I spent a few days vacationing in Seattle (without the kids - first time in 9 years!).
I'm hoping to share some of what I learned here on the blog over the next few weeks. I thought I'd start with these simply horrible photos (LOL). (I didn't have time to retake them - Vacation Bible School is taking over my life this week - so please bear with me).
When I started with Copics - I felt quite a bit of hostility towards my colorless blender - we just fought all the time. But that was because I didn't really understand what it was for and how to use it.

The name "blender" is a bit of a misnomer. While it can be used to blend under certain specific circumstances, its more often used to remove color.
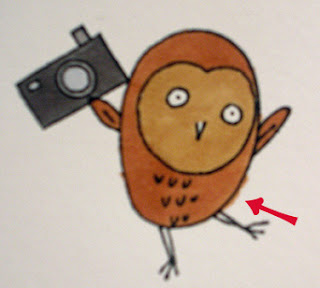
Here is one of the nifty things it will do - remove goofs! (which of course I NEED!). If you look at the terrible fuzzy photo to the right, squint and try really hard, you can see where I colored outside the image line.
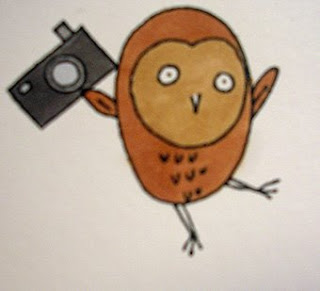
 Here is the same image (and an equally bad photo) with the "goof" corrected. Magic!
So - to do this you use your colorless blender pen and apply the blender from the outside edge of your "goof" towards the stamped line. Do not go over the line. The blender fluid will "push" the ink from the "goof" back into the image.
Some tips for doing this -
Go close to but not over the stamped line so you don't "push" the ink too far. Do not over saturate the area or the blender fluid will drift too far and make a "splotch" inside your image. Do maybe one or two swipes with the blender. If there is still some ink outside the line, let the area dry and repeat so you don't soak the paper with to much solution. You can repeat as many times as you wish - but it usually works pretty quickly - the above was only 1 correction.
So that is my first Copic Tip! Stay tuned for more info on colorless blender.
Oh - and I had a question about what stamping ink I use with Copic. I was using Brilliance Graphite Black that was heat set - But I have switched over completely to the Memento inks. I love them! I can color and color and they never smear (just make sure they are dry before you start.) The Memento Inks are available in the Paper Garden Projects store. The store carries the dew drops in all colors and the full size pads in Tuxede Black and Rich Cocoa Brown.
By the way - these super cute owl and camera images are from the "Say Cheese" kit over at Odd Bird Planet. The kit comes with paper, embellies and a sheet of rubber full of this owl in different poses - adorable!


3 comments:
Sounds like the class was a blast. I love this tip (now to get some copics, lol) Adorable owl! :0)
Great tip! I try not to go out of the lines as possible, but sometimes the marker just bleeds. Looking fwd to more
Thanks for the tip!!!! I'll definitely being putting that one to good and immediate use!
Post a Comment