No, this is not a Halloween post - its actually something much scarier........you ready......... only 83 more day till Christmas! Yikes!
Has anyone started getting ready yet? 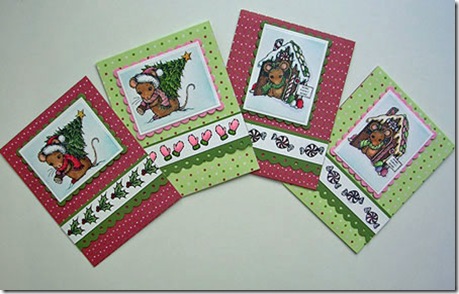
I like to give my girl's teachers a little gift. We have always had really wonderful, dedicated professionals and I like them to know that they are appreciated. Talking to friends who are teachers, it seems like the favorite gift is a gift card. It allows them to choose things they really need and sometimes even off sets some of the personal money they spend for extras in their classroom.
I thought I'd share a little tutorial for a gift card holder card. There are many of these out there and I'm sure mine is not unique - but here goes anyway.
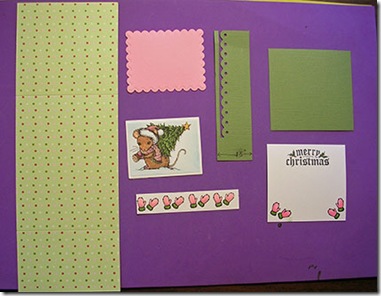 For this card you need a strip of card stock that is 4 1/4" wide by 12" long. For mine I used a double sided patterned paper by Heidi Grace. Score it at 2 1/2" and at 8".
You need an image, cropped and colored as desired. Here I used the Christmas Tree Mouse Clear set from Impression Obsession. I colored all the images with Copic Markers. I used a Nestibility die to crop my rectangle and then cut a scalloped rectangle for the matte.
You need a decorative strip for the bottom edge of the top flap. I cut a 3/4" strip of white and stamped other images from the stamp set. Then I cut a 1 1/2" strip of green cardstock and scalloped the edge with my Threading Water Border punch. After you punch, the border is only 1 1/4" wide.
Finally, you need a white square and matte for the inside. My white is 3 1/2" by 3 1/4" and the green matte is 3 3/4" by 3 1/2". I decorated the panel with more of the stamps from the set.
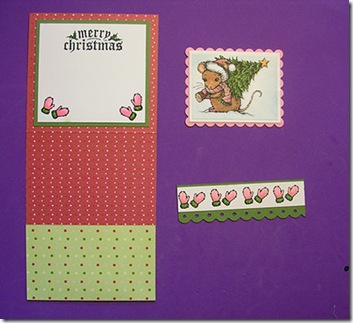 To assemble the card, fold the section you scored at 2" up to make the pocket to hold the gift card. Adhere the side edges. I like to use Oh So Sticky tape to make sure the pocket is very strong.
Matte the inside panel and adhere it to the card, centering it in the upper scored section. Matte the decorative strip on the scalloped matte and matte the colored main image.
Fold the top flap down at the score and adhere the matted image with foam tape. Adhere the decorative strip to the front of the flap to finish the card.
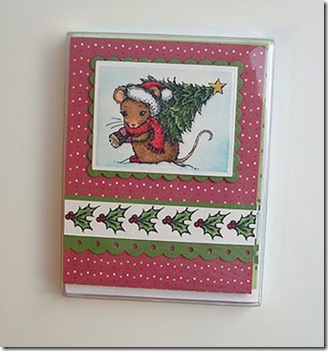 I actually decided to make a gift set of 4 cards using the Christmas Tree Mouse and the From Our Home to Yours stamps sets. I also alternated the two sides of the patterned paper so I came up with 4 combinations for my gift set.
I love to package sets in the Clear Card boxes. They look so professional! Here I used the 1/2" thick clear box and the 4 cards each with one layer of foam tape fit very comfortably.
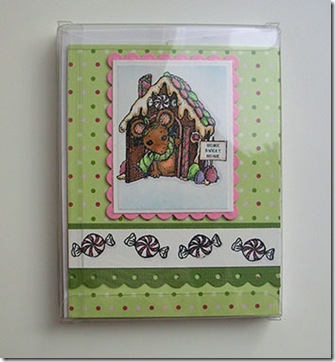 When I package these, I put three cards facing front, then the envelopes, and one facing the back. If someone looks at the package - its more interesting to have a card showing on the front and back rather than just the envelopes in the back.
Well, happy stamping everyone!
Oh - and if you were waiting on them, the clear pillow boxes are now back in stock.


5 comments:
Thank you for the wonderfully written tutorial. Your gift card holders are precious. Thank you for the great tip.
These are so cute!!!
thanks for sharing how you make these, might have to try some sometime!
Ooooooh, these are the most adorable cards. What a beauties !!!!
Adorable! I love that mouse & your cute layout. I can't believe Christmas is coming so soon! I'd better get busy, heehee. :O)
These are so cute. And beautiful colors. I can't believe Christmas is so close!
Post a Comment